进入mysql容器
操作vi etc/mysql/my.cnf
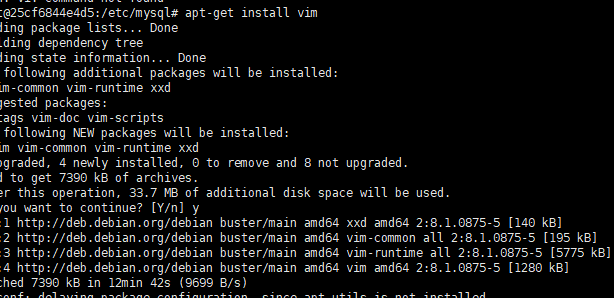
默认是不安装vi编辑器的,下面安装vi
更新安装包
apt-get update
安装vim
执行这条语句
apt-get install vim
到修改docker容器里面的mysql数据库密码了
启动mysql容器
docker exec -it mysql /bin/bash
编辑配置文件
我这里是没有这个配置文件,直接编辑即可,有的忽略
vi /etc/mysql/conf.d/docker.cnf
加上这4段
[mysqld]
skip-host-cache
skip-name-resolv睿共享 e
skip-grant-tables 跳过权限认证
保存退出
root@25cf6844e4d5:/# exit
exit
重启mysql容器
我命名的mysql容器名是mysql01,按照自己的名字重启
[root@rzk ~]# docker restart mysql01
mysql01
进入mysql容器,连接mysql
docker exec -it mysql /bin/bash
[root@rzk ~]# docker exec -it mysql01 /bin/bash
root@25cf6844e4d5:/# mysql -u root -p
Enter password:
Welcome to the MySQL monitor. Commands end with ; or g.
Your MySQL connection id is 275
Server version: 5.7.31 MySQL Community Server (GPL)
Copyright (c) 2000, 2020, Oracle and/or its affiliates. All rights reserved.
Oracle is a registered trademark of Oracle Corporation and/or its
affiliates. Other names 睿共享 may be trademarks of their respective
owners.
Type 'help;' or 'h' for help. Type 'c' to clear the current input statement.
mysql>
修改密码
mysql> use mysql;
Reading table information for completion of table and column names
You can turn off this feature to get a quicker startup with -A

Database changed
mysql> update user set authentication_string=password('密码')睿共享 where user='root';
Query OK, 0 rows affected, 1 warning (0.00 sec)
Rows matched: 2  Changed: 0  Warnings: 1
删除权限认证这行
skip-grant-tables 跳过权限认证 这一段需要删除,不然后续登录还是会免密码
[mysqld]
skip-host-cache
skip-name-resolve
skip-grant-tables 跳过权限认证
刷新权限
mysql> flush privileges;
Query OK, 0 rows affected (0.07 sec)
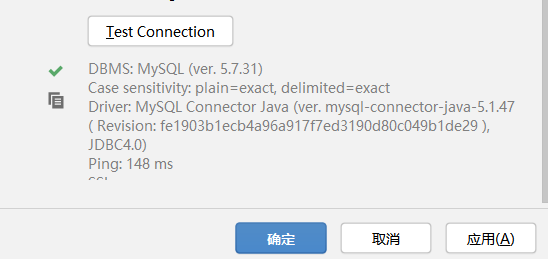
测试连接数据库
docker 里面安装mysql
**docker search搜索镜像 **
[root@iZwz94cw1gup8aldclit1qZ /]# docker search mysql
NAME           DESCRIPTION                                 STARS  OFFICIAL  AUTOMATED
mysql      MySQL is a widely used, open-source relation…   9582     [OK]
mariadb    MariaDB is a community-developed fork of MyS…   3482     [OK]

# 可选项  ,通过收藏来过滤
docker search mysql --filter=STARS=3000 #搜索出来的镜像就是STARS大与3000的

NAME           DESCRIPTION                                 STARS  OFFICIAL  AUTOMATED
mysql      MySQL is a widely used, open-source relation…   9582     [OK]
mariadb    MariaDB is a community-developed fork of MyS…   3482     [OK]

[root@iZwz94cw1gup8aldclit1qZ /]# docker search mysql --filter=STARS=5000
NAME           DESCRIPTION                                 STARS  OFFICIAL  AUTOMATED
mysql      MySQL is a widely used, open-source relation…   9582     [OK]
docker pull 下载镜像
# 下载镜像docker pull 镜像名
[root@iZwz94cw1gup8aldclit1qZ /]# docker pull mysql
Using default tag: latest # 如果不写tag 默认既是最新版
latest: Pulling from library/mysql
afb6ec6fdc1c: Pull complete # 分层下载,docker iamge的核心,联合文件系统
0bdc5971ba40: Pull complete
97ae94a2c729: Pull complete
f77睿共享 7521d340e: Pull complete
1393ff7fc871: Pull complete
a499b89994d9: Pull complete
7ebe8eefbafe: Pull complete
597069368ef1: Pull complete
ce39a5501878: Pull complete
7d545bca14bf: Pull complete
211e5bb2ae7b: Pull complete
5914e537c077: Pull complete
Digest: sha256:a31a277d8d39450220c722c1302a345c84206e7fd4cdb619e7face046e89031d #签名
Status: Downloaded newer image for mysql:latest
docker.io/library/mysql:latest #真实地址
# 等价于它
> docker pull mysql == docker.io/library/mysql:latest
#指定版本下载
```shell
[root@iZwz94cw1gup8aldclit1qZ /]# docker pull mysql:5.7
5.7: Pulling from library/mysql
afb6ec6fdc1c: Already exists
0bdc5971ba40: Already exists
97ae94a2c729: Already exists
f777521d340e: Already exists
1393ff7fc871: Already exists
a499b89994d9: Already exists
7ebe8eefbafe: Already exists
4eec965ae405: Pull complete
a531a782d709: Pull complete
270aeddb45e3: Pull complete
b25569b61008: Pull complete
Digest: sha256:d16d9ef7a4ecb29efcd1ba46d5a82bda3c28bd18c0f1e3b86ba54816211e1ac4
Status: Downloaded newer image for mysql:5.7
docker.io/library/mysql:5.7
启动
-d 后台运行
-p 端口映射
-v 卷挂载
-e 环境配置
–name 容器名字
-v /home/mysql/data:/var/lib/mysql 把mysql里面的东西挂载到data里面
[root@iZwz94cw1gup8aldclit1qZ home]# docker run -d -p 3310:3306 -v /home/mysql/conf:/etc/mysql/conf.d -v /home/mysql/data:/var/lib/mysql -e MYSQL_ROOT_PASSWORD=123456 --name mysql01 mysql:5.7
be3e92f2f41715d7ce90c8b8af2a3506bacb6c50740d29ae88c4ec320b973279
启动成功之后,我们本地使用sqlyog来连接测试一下
sqlyog -连接到服务器的3310 — 331- 和容器内的3306映射,这个时候我们可以连接上了在本地测试一个数据库,查看一下我们映射的路径是否ok!
步骤在SQLyog 新建一个test数据库,然后去终端mysql/data查看会不会出现一个test名字的文件
[root@iZwz94cw1gup8aldclit1qZ home]# ls
ceshi mysql nginx-1.14.0 nginx-1.14.0.tar.gz rzk
[root@iZwz94cw1gup8aldclit1qZ home]# cd mysql
[root@iZwz94cw1gup8aldclit1qZ mysql]# ls
conf data
[root@iZwz94cw1gup8aldclit1qZ mysql]# cd data
[root@iZwz94cw1gup8aldclit1qZ data]# ls
auto.cnf ca.pem 睿共享 client-key.pem ibdata1 ib_logfile1 mysql private_key.pem server-cert.pem sys
ca-key.pem client-cert.pem ib_buffer_pool ib_logfile0 ibtmp1 performance_schema public_key.pem server-key.pem
[root@iZwz94cw1gup8aldclit1qZ data]# ls
auto.cnf ca.pem client-key.pem ibdata1 ib_logfile1 mysql private_key.pem server-cert.pem sys
ca-key.pem client-cert.pem ib_buffer_pool ib_logfile0 ibtmp1 performance_schema public_key.pem server-key.pem test


